Unlocking the Beauty: Choosing the Best Timber Species to Paint for Lasting Results
Selecting the best timber species to paint is crucial for achieving a beautiful, long-lasting finish. The wrong choice can lead to paint failure, warping, or even rot. This comprehensive guide will explore the characteristics that make certain timber species ideal for painting, ensuring your project stands the test of time. We’ll delve into the properties of different woods, the best preparation techniques, and provide expert advice to help you make the right decision. Whether you’re painting furniture, siding, or trim, understanding the nuances of timber will lead to professional-quality results.
Understanding Timber Properties for Optimal Paint Adhesion
Not all timber is created equal. The density, grain pattern, resin content, and moisture absorption rate significantly impact how well paint adheres and performs over time. Softwoods and hardwoods react differently to paint, and understanding these differences is the first step in selecting the best timber species to paint.
Density and Porosity
Denser woods generally provide a smoother surface for painting but can be more resistant to paint absorption. Porous woods, on the other hand, readily absorb paint but may require more coats to achieve full coverage. Finding the right balance is key. Woods like poplar offer a good balance.
Grain Pattern
A tight, even grain pattern is preferable for painting. Woods with prominent or open grains may require grain fillers to create a smooth surface. Consider species like maple or birch for a fine-grained surface that readily accepts paint. The goal is to minimize imperfections that can show through the paint.
Resin and Oil Content
Timber species high in resin or oil, such as pine and cedar, can interfere with paint adhesion. These oils can bleed through the paint, causing discoloration or peeling. Proper sealing and priming are essential when painting resinous woods. Degreasing the surface before priming can also improve adhesion. Some find that letting the wood age slightly, allowing some of the oils to naturally dissipate, can be helpful.
Moisture Content
The moisture content of timber is critical. Painting timber with high moisture content can lead to paint blistering, cracking, or peeling as the wood dries and shrinks. Kiln-dried timber with a moisture content between 12% and 15% is ideal for painting. Always use a moisture meter to check the moisture level before painting.
Top Timber Species for Painting: A Detailed Comparison
Here’s a breakdown of some of the best timber species to paint, considering their properties and suitability for various applications:
- Poplar: A versatile hardwood with a smooth, even grain and moderate density. Poplar is easy to work with, accepts paint well, and is relatively inexpensive, making it a popular choice for furniture, trim, and millwork.
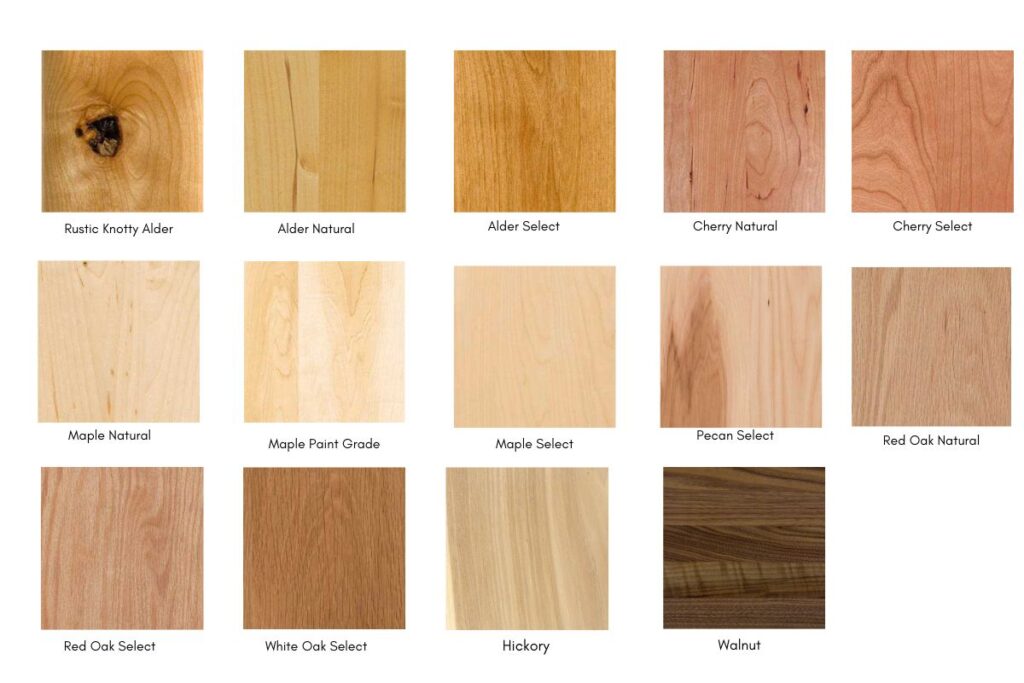
- Maple: A dense hardwood with a very fine grain, providing an excellent surface for painting. Maple is durable and resistant to wear, making it suitable for high-traffic areas and furniture. However, its density can make it slightly more challenging to paint.
- Birch: Similar to maple, birch has a fine grain and smooth surface that accepts paint well. It’s slightly softer than maple, making it easier to work with. Birch is often used for cabinets, doors, and furniture.
- Pine (Knot-Free): While pine is generally resinous, knot-free pine offers a more stable and paintable surface. Look for clear pine boards with minimal knots to reduce the risk of resin bleed-through. Pine is a cost-effective option for interior trim and furniture.
- Medium Density Fiberboard (MDF): While technically not timber, MDF is an engineered wood product specifically designed for painting. It has a smooth, consistent surface, no grain, and minimal expansion or contraction, making it an excellent choice for cabinets, doors, and trim.
Preparing Timber for Painting: Achieving a Flawless Finish
Proper preparation is just as important as selecting the best timber species to paint. A well-prepared surface ensures optimal paint adhesion, durability, and a professional-looking finish. Here’s a step-by-step guide to preparing timber for painting:
- Cleaning: Remove any dirt, dust, grease, or mildew from the surface. Use a mild detergent and water solution, followed by a thorough rinse. Allow the timber to dry completely before proceeding.
- Sanding: Sand the surface to create a smooth, even profile and improve paint adhesion. Start with a coarser grit sandpaper (e.g., 80-grit) to remove any imperfections, then move to a finer grit (e.g., 120-grit, then 220-grit) for a smooth finish. Always sand in the direction of the grain.
- Filling: Fill any holes, cracks, or imperfections with wood filler. Allow the filler to dry completely, then sand it smooth to blend with the surrounding surface.
- Priming: Apply a high-quality primer specifically designed for wood. Primer seals the timber, prevents paint absorption, and provides a uniform surface for the paint to adhere to. Use a stain-blocking primer for resinous woods like pine to prevent bleed-through.
- Caulking (Optional): Apply caulk to any gaps or joints to create a seamless finish and prevent moisture intrusion. Use a paintable caulk and smooth it with a wet finger or tool.
- Light Sanding (After Priming): After the primer dries, lightly sand the surface with a fine-grit sandpaper (e.g., 320-grit) to remove any imperfections and create an even smoother surface.
- Tack Cloth: Use a tack cloth to remove any remaining dust particles before painting.
The Science Behind Primers and Sealers for Wood
Primers and sealers are essential for achieving a durable and beautiful paint finish on wood. They serve several critical functions:
- Sealing the Wood: Primers seal the pores of the wood, preventing excessive paint absorption. This ensures that the paint film has uniform thickness and color.
- Promoting Adhesion: Primers create a strong bond between the wood surface and the paint, preventing peeling, cracking, and blistering.
- Blocking Stains: Stain-blocking primers prevent tannins, resins, and other extractives from bleeding through the paint, causing discoloration.
- Creating a Uniform Surface: Primers create a smooth, even surface for the paint to adhere to, minimizing imperfections and enhancing the overall finish.
There are several types of primers available, each with its own advantages and disadvantages:
- Oil-Based Primers: Excellent adhesion and stain-blocking properties, but can be slow-drying and require mineral spirits for cleanup.
- Latex Primers: Easy to apply, quick-drying, and water-based for easy cleanup, but may not be as effective at blocking stains as oil-based primers.
- Shellac Primers: Excellent stain-blocking properties and adhere to almost any surface, but can be brittle and require denatured alcohol for cleanup.
- Acrylic Primers: Versatile and durable, with good adhesion and stain-blocking properties. They are also water-based for easy cleanup.
Paint Types and Their Compatibility with Different Timber Species
Choosing the right type of paint is crucial for achieving a durable and aesthetically pleasing finish. Different paint types have different properties and are best suited for different applications and timber species.
- Latex Paints: Water-based paints that are easy to apply, quick-drying, and low in VOCs (volatile organic compounds). Latex paints are flexible and resistant to cracking, making them a good choice for exterior applications and timber that is subject to expansion and contraction. They work well with poplar and MDF.
- Oil-Based Paints: Durable and provide a smooth, glossy finish. Oil-based paints are more resistant to wear and tear than latex paints, making them a good choice for high-traffic areas and furniture. However, they are slow-drying, high in VOCs, and require mineral spirits for cleanup. They are a good choice for hardwoods like maple and birch.
- Acrylic Paints: Versatile and durable paints that can be used on a variety of surfaces. Acrylic paints have good adhesion, water resistance, and UV resistance, making them a good choice for both interior and exterior applications.
- Alkyd Paints: Similar to oil-based paints, but with improved drying time and lower VOCs. Alkyd paints provide a durable, glossy finish and are a good choice for trim, doors, and furniture.
Color Considerations and Paint Sheen for Timber
The color and sheen of the paint can significantly impact the overall look and feel of your project. Consider the following factors when choosing a color and sheen:
- Color: Choose a color that complements the surrounding environment and your personal style. Lighter colors can make a room feel larger and brighter, while darker colors can create a more intimate and cozy atmosphere.
- Sheen: The sheen of the paint refers to its level of glossiness. Different sheens have different properties and are best suited for different applications:
- Matte: Non-reflective and hides imperfections well. Best for walls in low-traffic areas.
- Eggshell: Slightly more sheen than matte and is more durable and easier to clean. Good for walls in living rooms and bedrooms.
- Satin: More sheen than eggshell and is even more durable and easier to clean. Good for trim, doors, and cabinets.
- Semi-Gloss: Highly reflective and very durable and easy to clean. Best for kitchens, bathrooms, and high-traffic areas.
- Gloss: The most reflective and durable sheen. Best for trim, doors, and furniture that require frequent cleaning.
Troubleshooting Common Painting Problems on Timber
Even with careful preparation and the best timber species to paint, you may encounter some common painting problems. Here are some tips for troubleshooting:
- Peeling Paint: Caused by poor adhesion. Ensure the surface is properly cleaned, sanded, and primed.
- Cracking Paint: Caused by expansion and contraction of the timber. Use a flexible paint and avoid painting timber with high moisture content.
- Blistering Paint: Caused by moisture trapped beneath the paint film. Allow the timber to dry completely before painting and ensure proper ventilation.
- Resin Bleed-Through: Caused by resin seeping through the paint. Use a stain-blocking primer and consider using knot-free timber.
- Uneven Color: Caused by uneven paint application or variations in the timber’s absorbency. Apply multiple thin coats of paint and use a primer to create a uniform surface.
Real-World Examples: Success Stories with Painted Timber
Consider the case of a homeowner who used poplar to create custom kitchen cabinets. By carefully sanding, priming with an acrylic latex primer, and finishing with two coats of a satin latex paint, they achieved a beautiful and durable finish that has lasted for years. Contrast this with another homeowner who painted pine siding without proper priming. Within a year, the paint began to peel and crack due to resin bleed-through and moisture intrusion. These examples highlight the importance of selecting the best timber species to paint and following proper preparation techniques.
Expert Tips for Long-Lasting Painted Timber
- Choose the right timber: Select a timber species that is known for its paintability and stability.
- Prepare the surface properly: Clean, sand, and prime the timber thoroughly.
- Use high-quality paint: Choose a paint that is specifically designed for wood and is compatible with the timber species.
- Apply multiple thin coats: Avoid applying thick coats of paint, which can lead to cracking and peeling.
- Maintain the finish: Clean the painted surface regularly and touch up any damaged areas.
Choosing the Right Wood: A Summary
Selecting the best timber species to paint involves understanding the properties of different woods, proper preparation techniques, and the compatibility of various paints and primers. By following the expert advice in this guide, you can achieve a beautiful, long-lasting finish that enhances the beauty and durability of your project. Remember that the right timber, combined with careful preparation and quality materials, is the key to a successful and visually stunning painted project. Share your project experiences with best timber species to paint in the comments below!

